Event Scheduling

Once the entries are closed, scheduling process should then start. Before you get scheduling happening, you need to:
Create time limit for your competition
Time limit allows you to define minimum and maximum performance time for a competitor. Schedule duration time is how long to allow when scheduling the section between competitors, giving you an overall estimation duration that a section will run for.
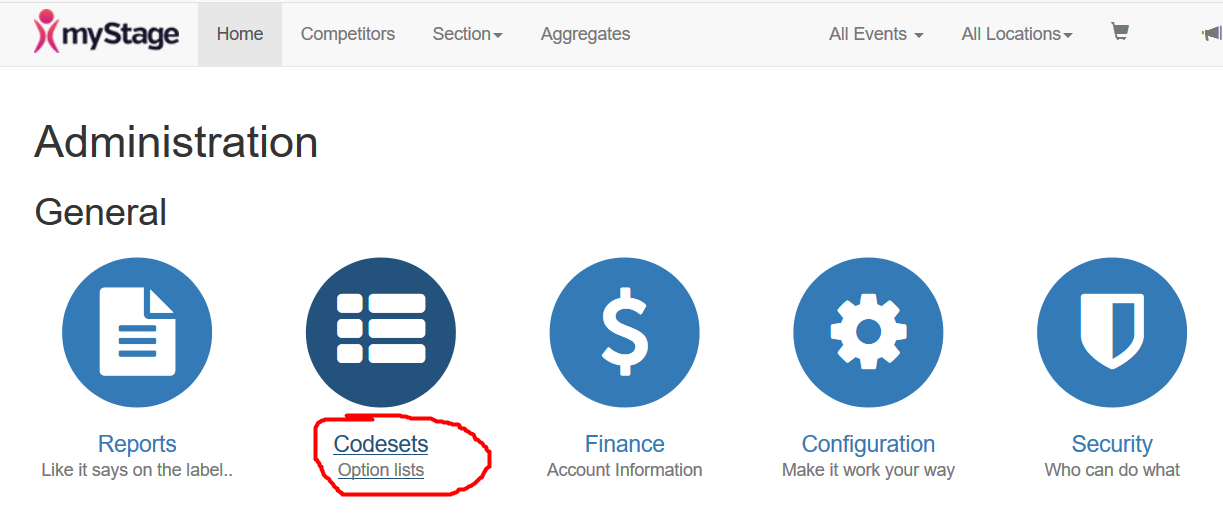
Go to administration pages in myStage and click on Codesets
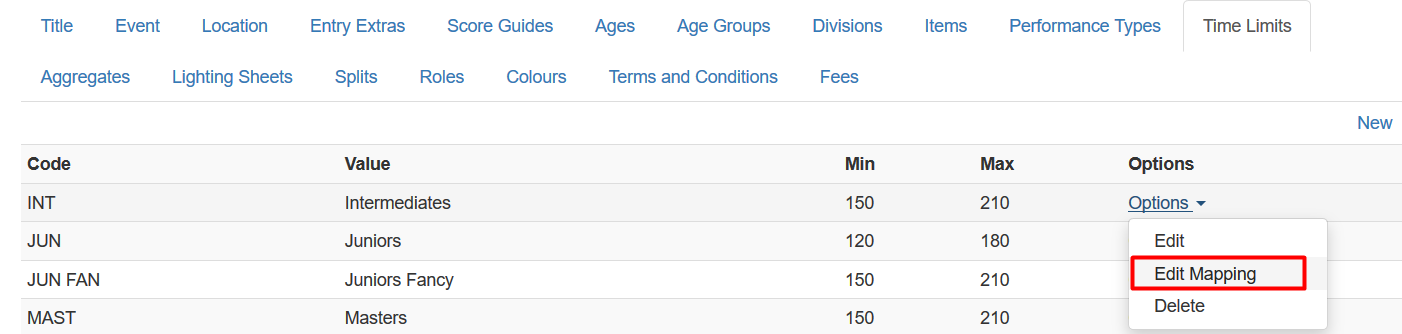
Create the time limits in codesets. Have minimum and maximum times are the rule times.

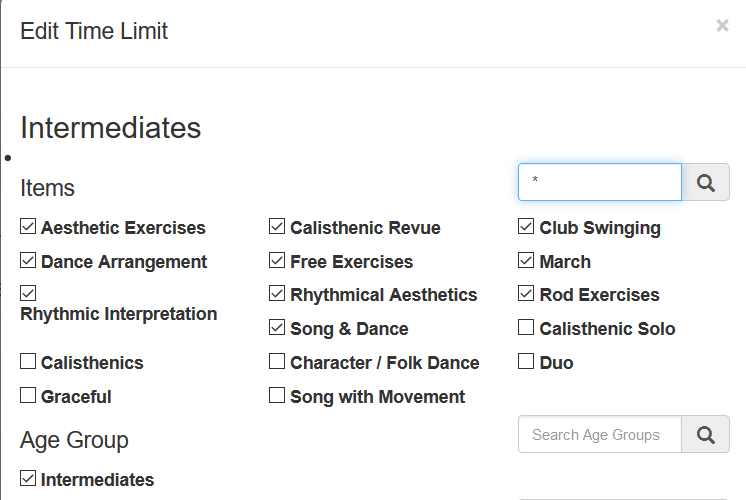
Map the time limits to items, age groups etc. Same as always, start broad, add more narrow restrictions where required.
Edit schedule & Apply Time Limits
Go to Admin/Events, and select “Update time limits” in the options menu.
OR – go to sections and set the time limits there.
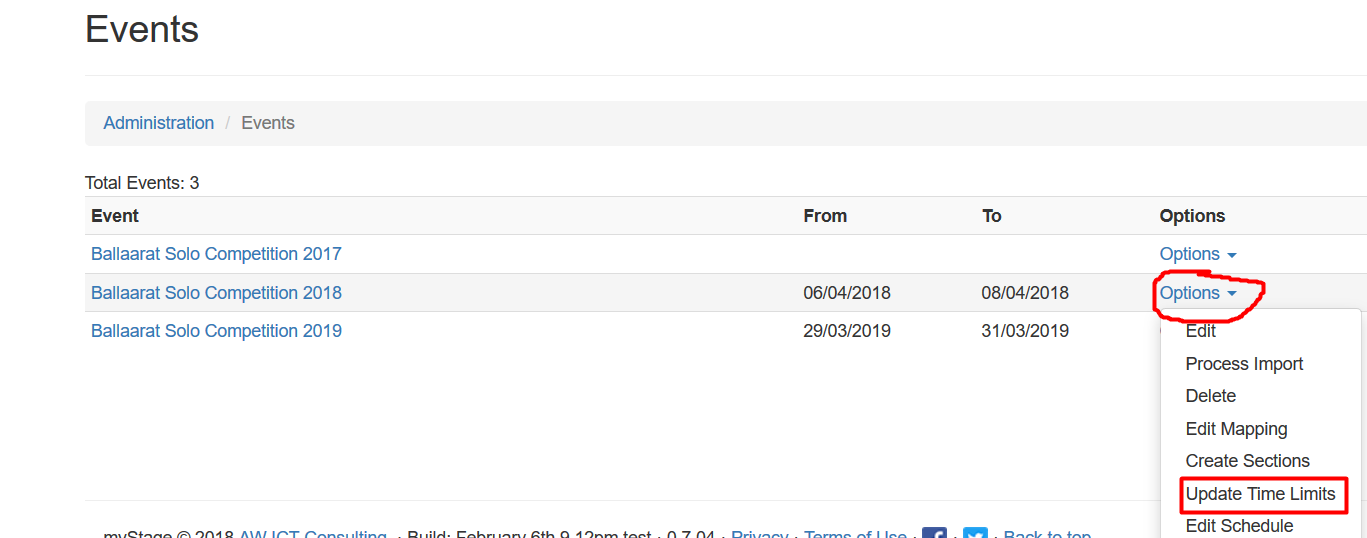
To edit your competition schedule, from the administration screen, click on Events, select ‘Edit Schedule’ from the options drop down as show in the screenshot below. From the Same option list, you may apply the time limit before or after editing the schedule.
Release schedule
Once you are happy with how the schedule looks, you may choose to randomise competitors order, save your changes, then choose release schedule from the option list. The scheduled will get emailed out to all the entrants of the event.
Moving competitor between sections
Sometimes you may need to move a competitor between sections.
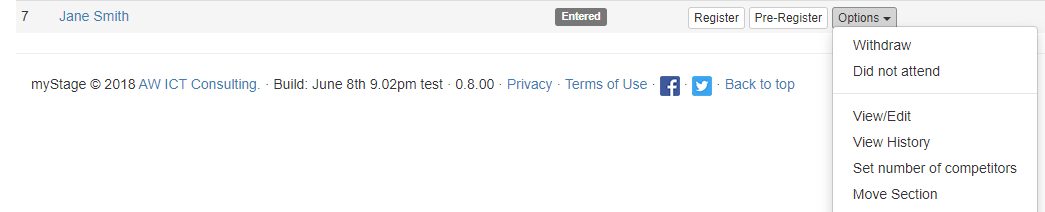
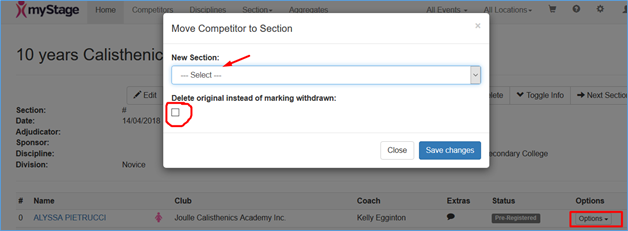
To move an individual entry to another section, click on options on the entry. Then click Move Section
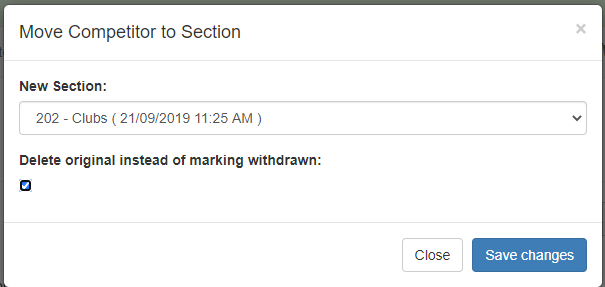
You will be prompted to enter the section you wish to move to, and whether you want to delete the original entry. If you don't tick the box to delete, the original will be marked as withdrawn with a note. Click Save Changes
You will then see the competitor listed in the new section. They will be allocated a new competitor number.

Note
You can only move competitors between sections in the same event. If you can't find the section you are looking for, check it has an event set.
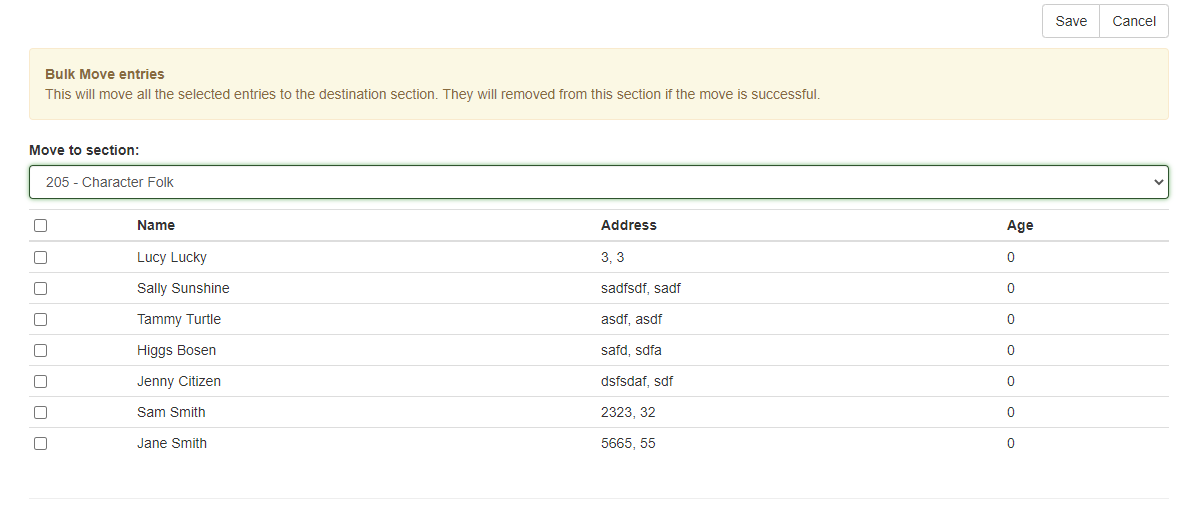
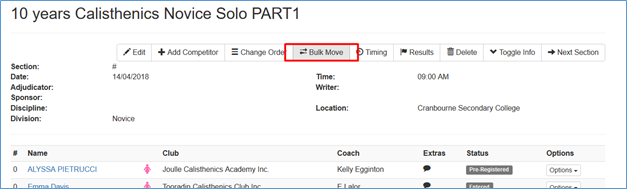
Bulk Moves
The bulk move is similar to an individual move, but you can move a whole section at once. This will delete the original visit, rather than marking it withdrawn as above.
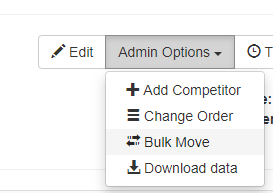
To perform a bulk move, click Admin Options and then choose Bulk Move
No bulk move?
Can't see the bulk move button? Speak to your competition administrator to get permission.
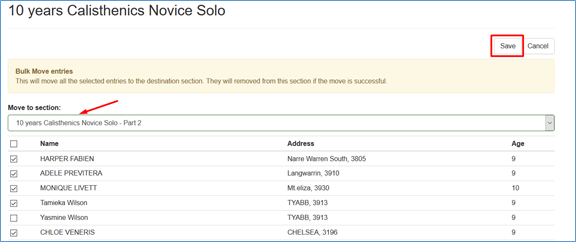
You will see a screen where you can choose the section to move to, and which competitors you wish to move. Tick the box and click save to move all selected competitors.
Splitting Sections
If a section is too long and you would like to split it into different parts such as 10 years Calisthenics Novice Solo - Part1 and so forth, you can do this by following the process:
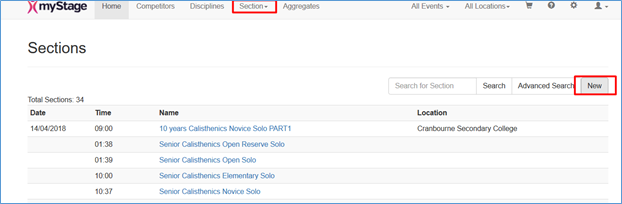
Create a new Section from the myStage top menu, click on Section then New if does not already exist
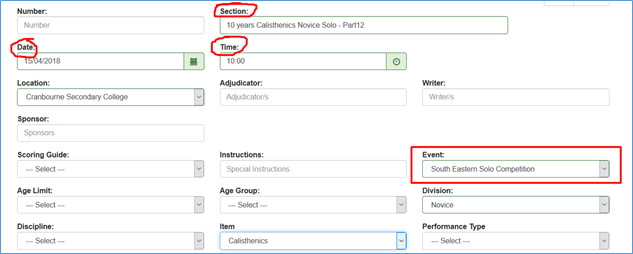
Give your new section a clear name such 10 years Calisthenics Novice Solo – Part2. Make sure to include the date, time, location and the Event attached to this section as highlighted in the screenshot below. Press Save once the details have been entered.
Now you that have created the new section, you can move selected competitors to the new section. Go to the section where you want to move competitors from. Alongside the competitor you want to move, on the right side of the section screen, under options, click ‘Move Section’.
Select the new section the competitor need to be moved into, check ‘delete original …’ check box so it deletes the record from the current section as it is getting moved to the new section, then press Save changes
If you have more than 1 competitor to move, you may utilise ‘’Bulk move’ functionality, located on the top of the section screen.
Select the new section the competitors need to be moved into, select each of the competitors to be moved, if all of the competitors need to be moved to the selected section, click on the first check box which should select all check boxes, press Save when done to complete the change.