Set up an event with the wizard
The event setup wizard is the recommended way to create a new event. It walks you through the event details, the items competitors can enter, the sections that are created from them, and the registration data you want to collect, all in one place.
Note
The wizard is marked as currently under development. Everything it creates can be changed later from the event page, as described in How to setup for entries.
The wizard has five steps, shown across the top of the page:
- Event Details
- Items
- Sections
- Extras
- Reg Data
You can move back to an earlier step at any time with the Back button. Your changes on each step are saved when you press the button to go to the next step.
Before you start
Check that your organisation's timezone is set. Entry open and close times are interpreted in your organisation's timezone. If it isn't set, a reminder appears on the Administration dashboard with a Set timezone link.
Tip
If you already have locations (venues) set up in Reference Data, you can link them to the event once the wizard is finished. The wizard itself doesn't ask for a location. See Map the Items and Locations to the Event.
Start the wizard
- From the Administration dashboard, click Events.
-
Click New Wizard.
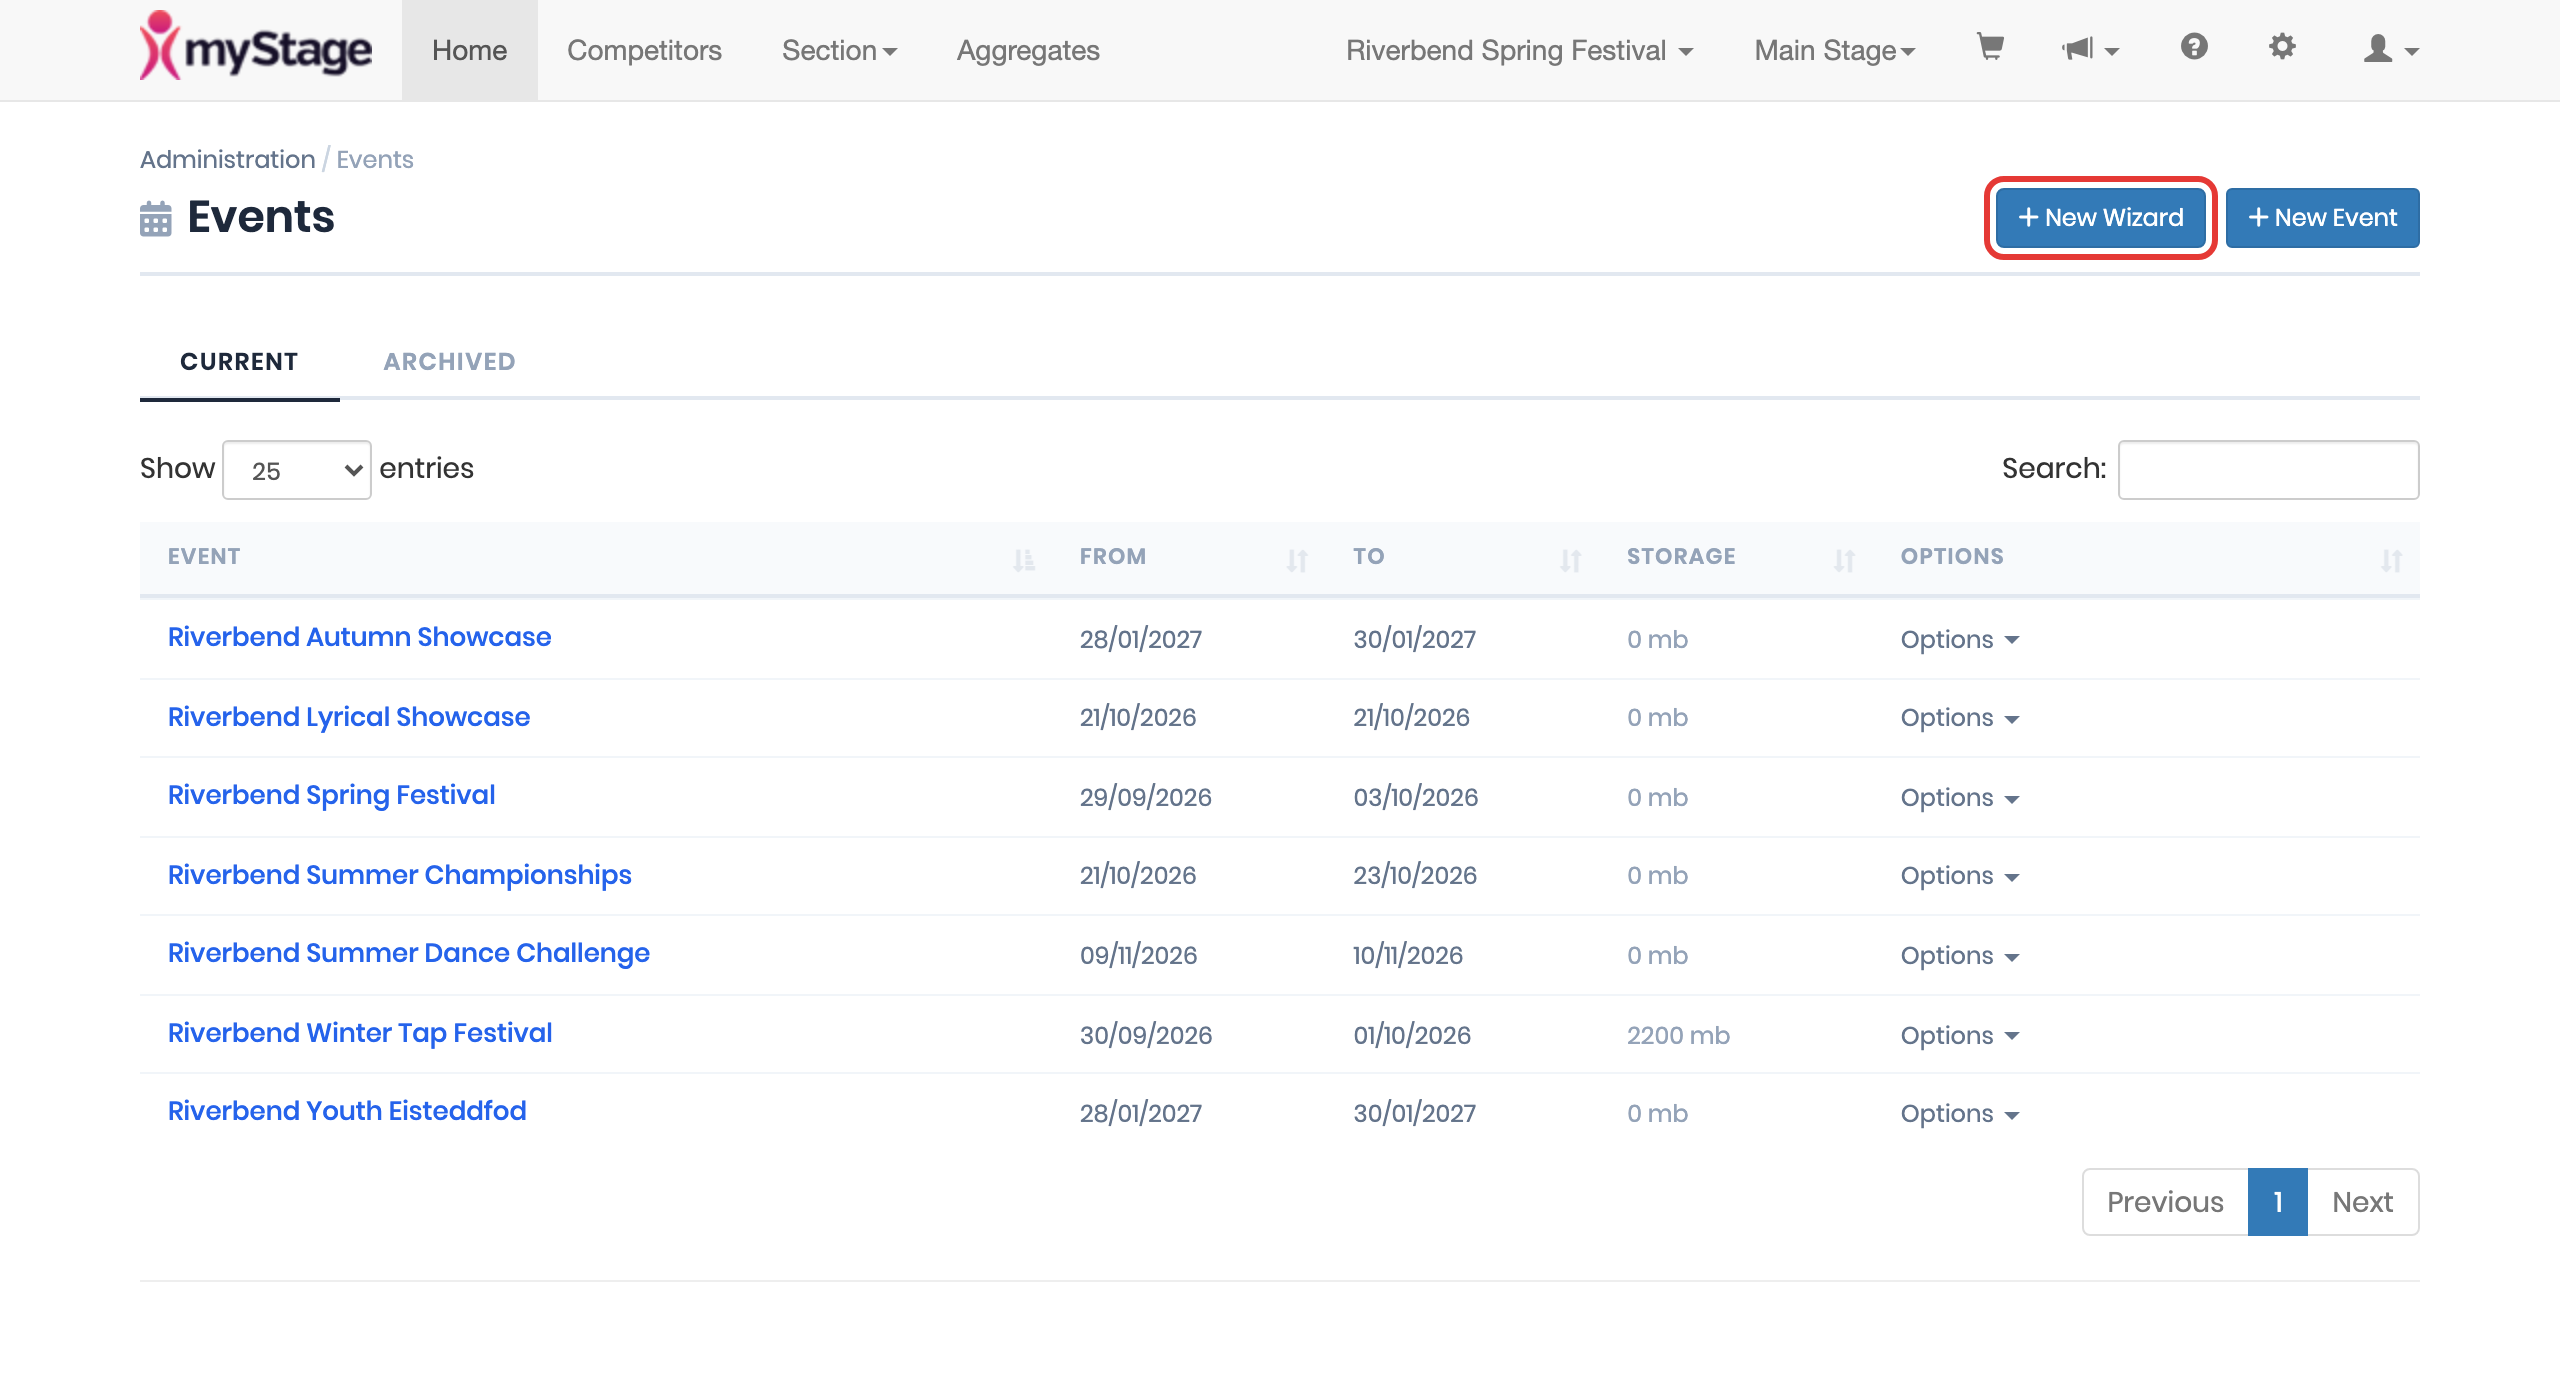
Note
If your organisation has no events yet, the setup checklist on the Administration dashboard also has a Start event wizard button.
-
Choose how to start:
- Start Fresh – create a new event from scratch.
- Copy from Existing Event – pre-fill settings and items from a previous event. Select the event from the drop-down list.
- Click Continue.
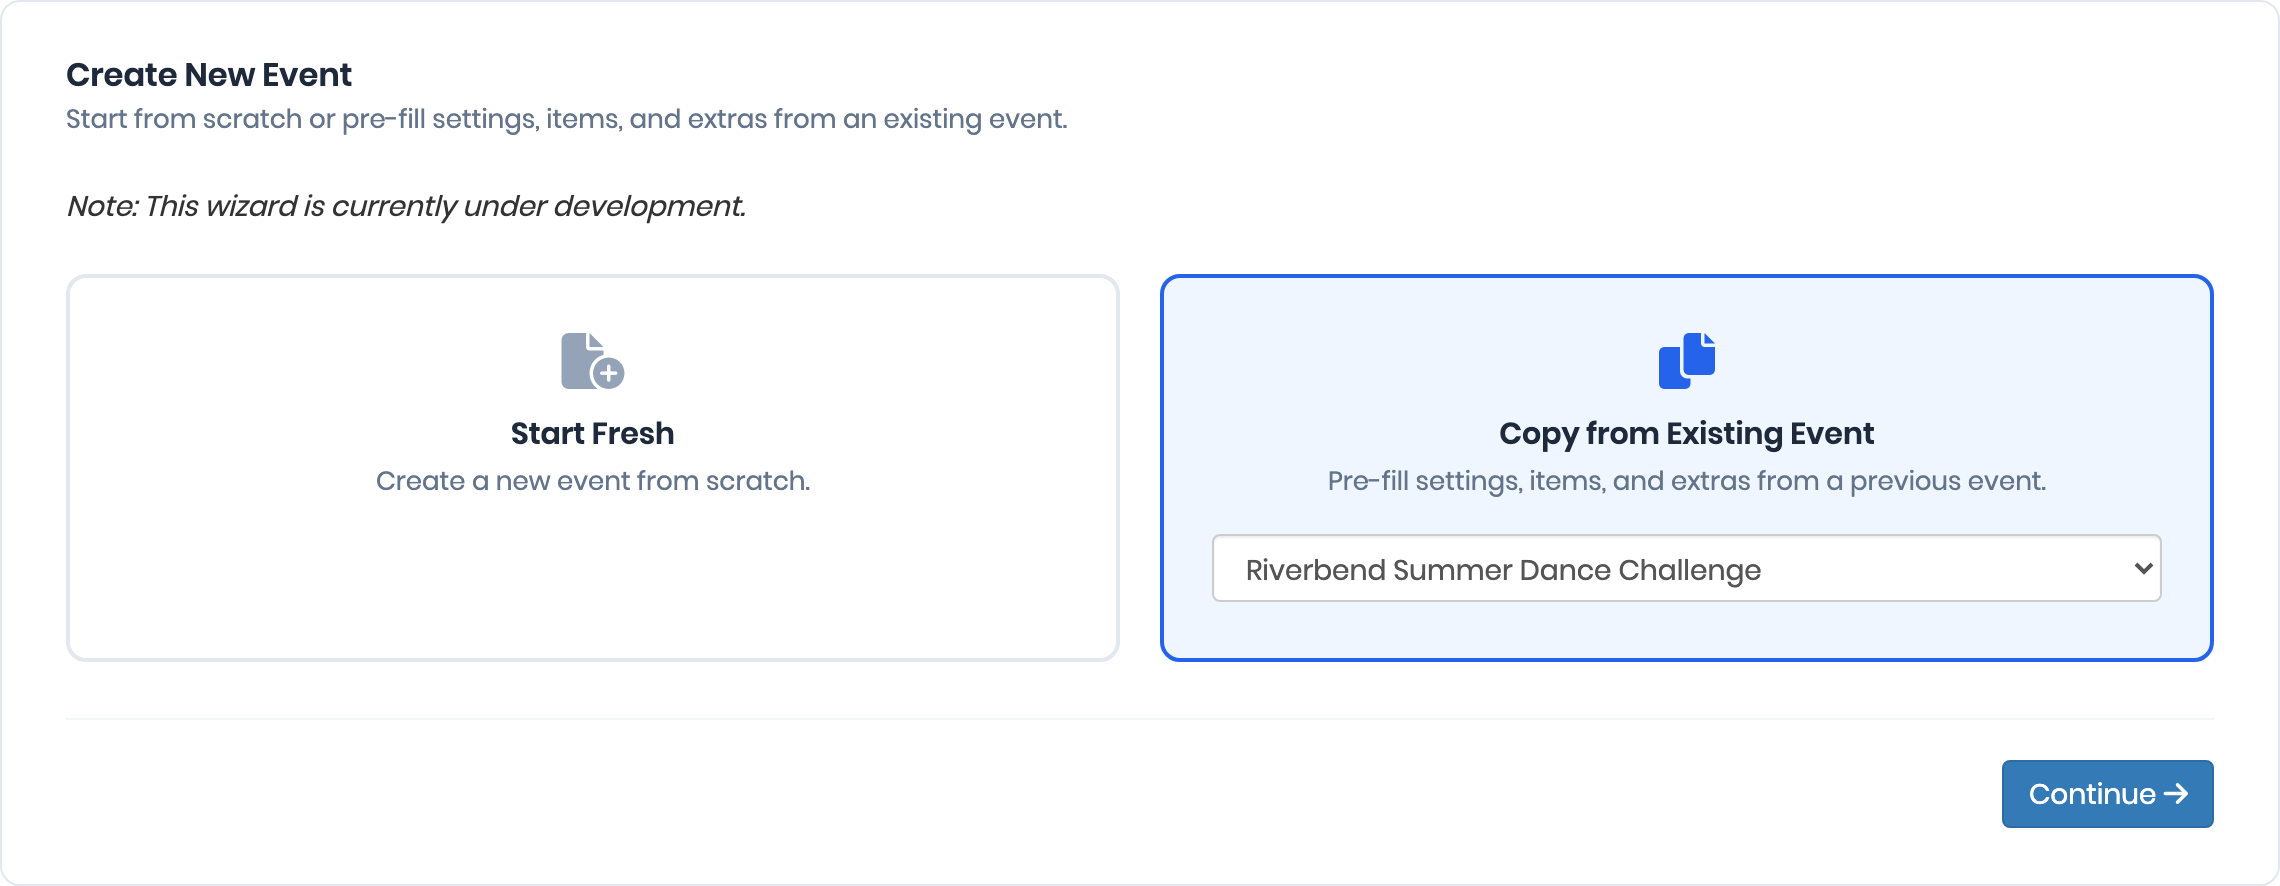
Copying an event
When you copy an event, the new event is named "Copy of" followed by the original name, and the items and their age groups, ages, divisions and performance types are copied across. The event dates and the entries open and close dates and times are not copied, so you need to enter new ones.
If your organisation has no events yet, the wizard skips this page and goes straight to Event Details.
Step 1: Event Details
Give your event a name, set the dates and configure entry settings.
- Enter the Event Name, for example "2026 Spring Solo Championships". This is required.
- Optionally enter a short Description (up to 255 characters).
- Set Event Starts and Event Ends – the dates the competition runs.
- Set Entries Open and Entries Close dates, and a Time for each (24-hour, HH:mm). Times are in your organisation's timezone.
- Enter the Default Entry Fee. This is the price per section unless a different price is set on an item, age, division or performance type. If your organisation has a processing fee, a note below the field explains whether it is added on top of this amount or deducted from your payout.
- Choose the Tax Type.
- Tick Active so the event is enabled in the system.
- Tick Public Visible if you want the event to appear on public event lists straight away. You can leave this unticked and publish the event later.
- Click Next: Items & Categories.
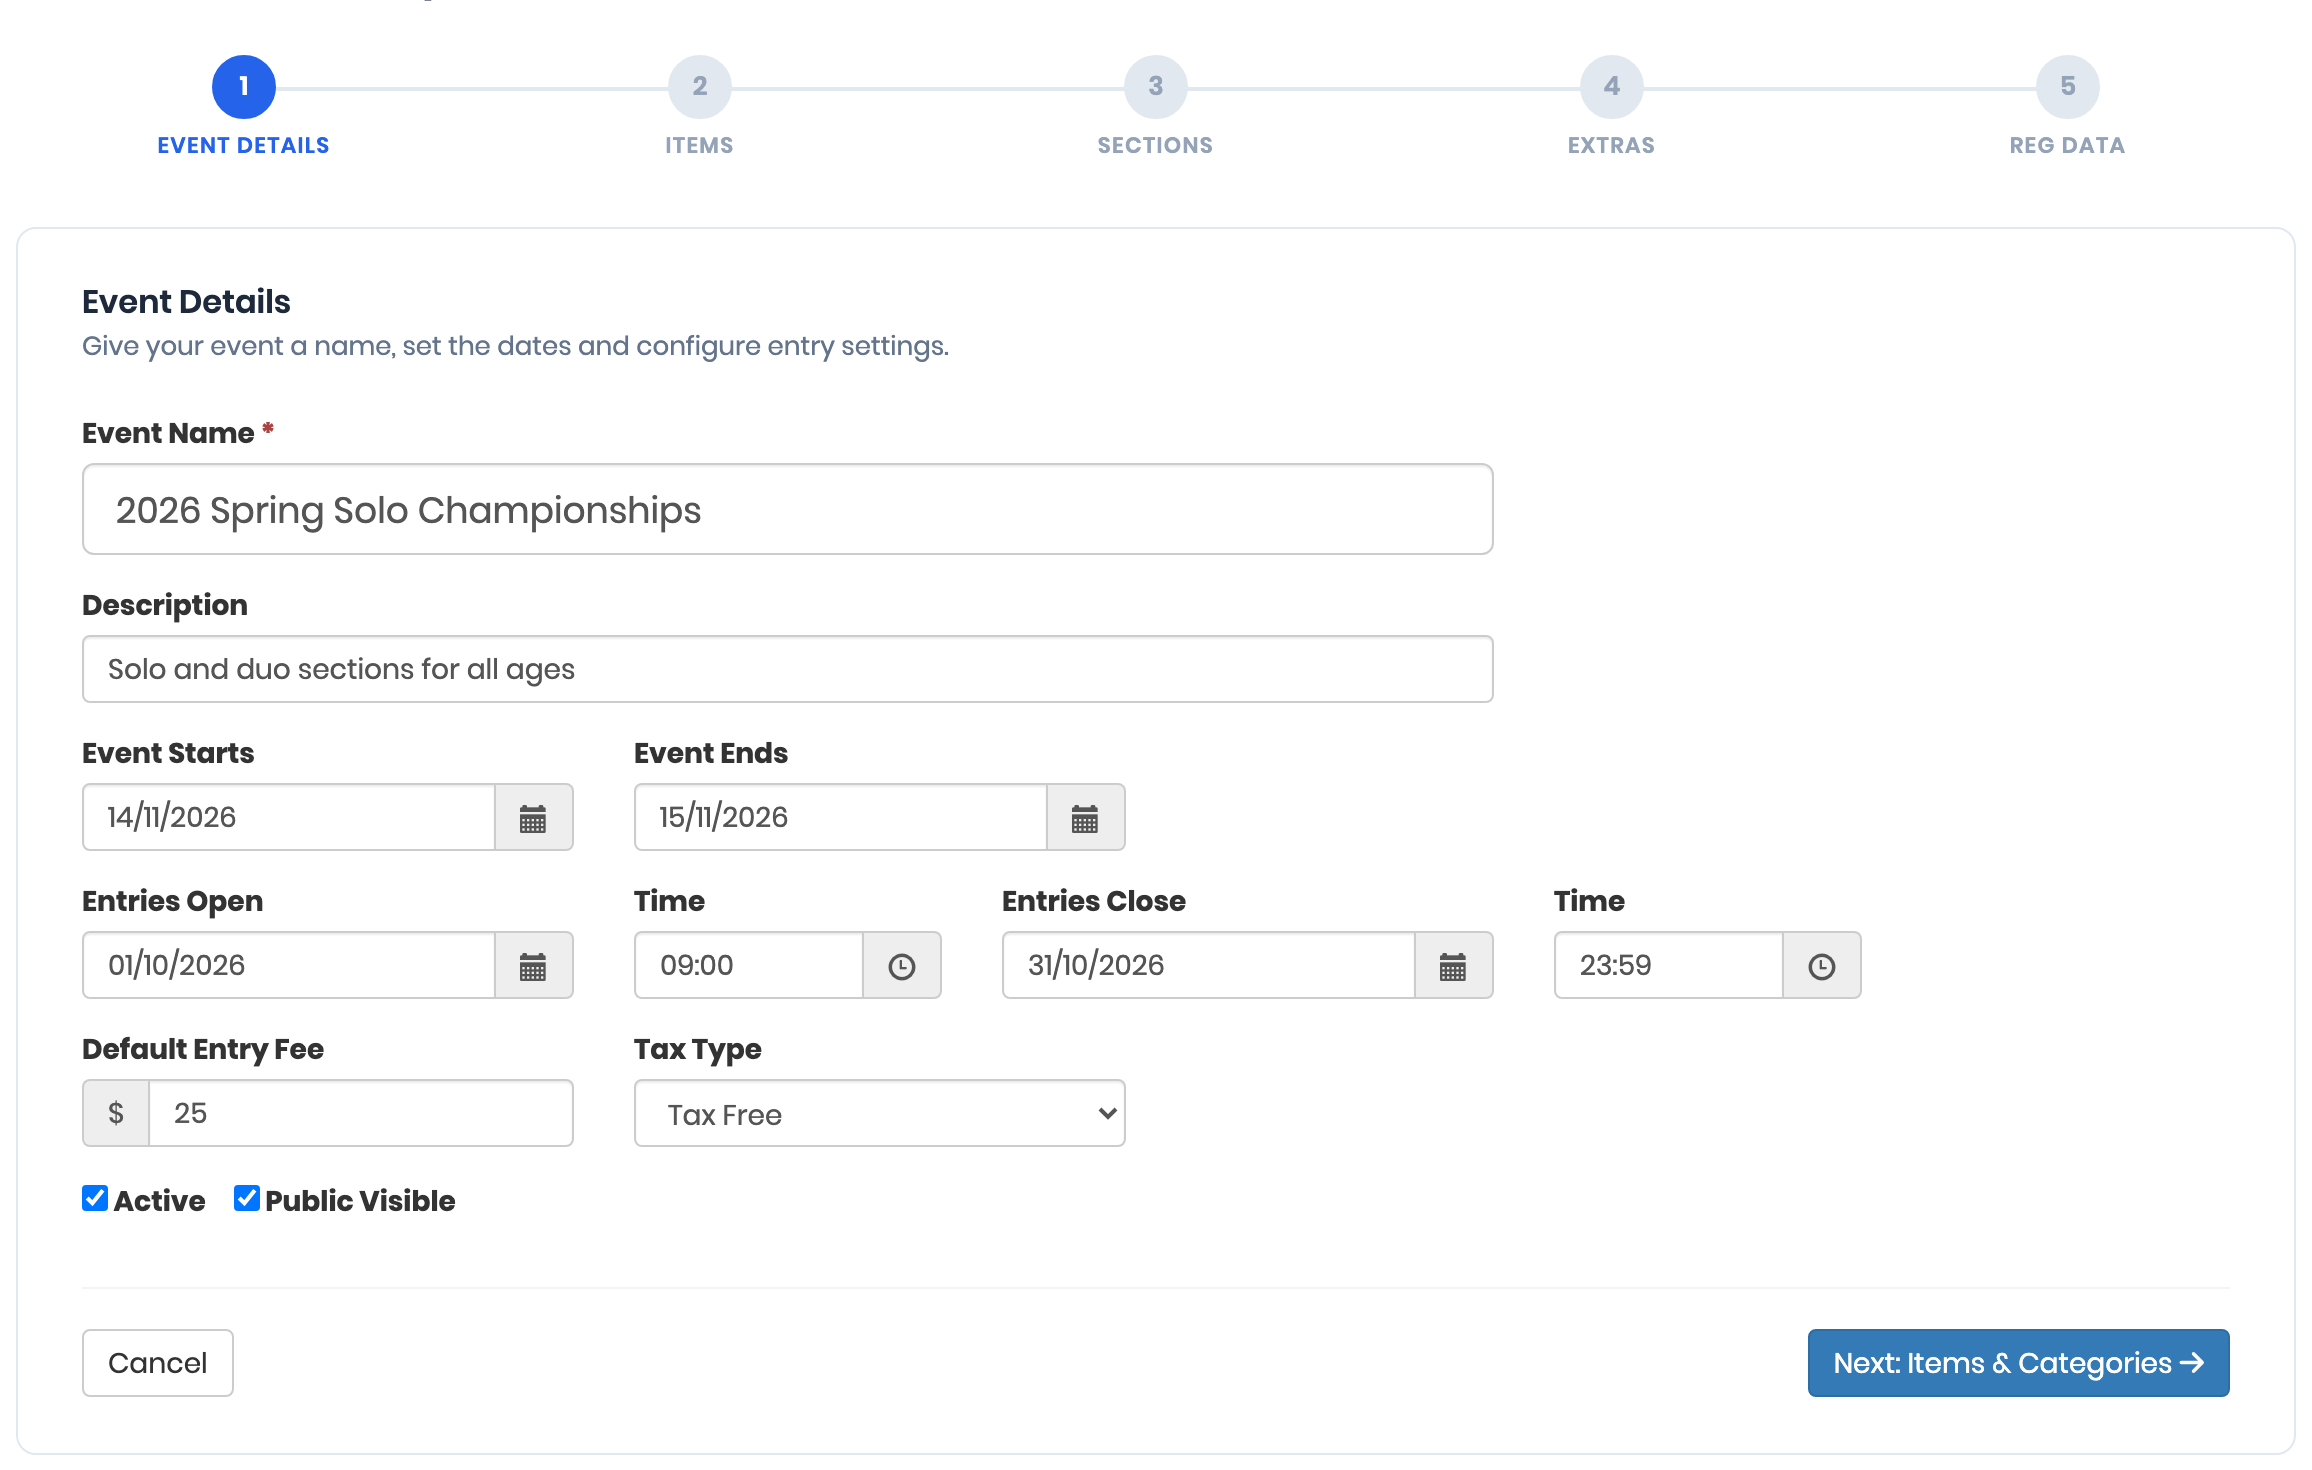
Tip
Settings such as pre-registration dates, the date for age calculation, maximum entries and entry rules aren't in the wizard. Set them afterwards with Edit Details on the event page. See Edit event settings.
Step 2: Items & Categories
Add the items competitors will perform in. For each item, add performance types, age groups, and optionally ages and divisions. The wizard combines these to build the list of sections in the next step.
- Type the item name in the box, for example "Calisthenics" or "Tap".
- Under Performance Types, add at least one type (for example Solo, Duo, Trio, Group).
- Under Age Groups, add at least one age group (for example Junior, Senior).
- Optionally, under Ages add age restrictions (for example "Under 12"), and under Divisions add divisions (for example Open, Novice).
- Click Add another item to add more items. To remove an item, click the cross in its top right corner.
- Click Next: Preview Sections.
To add a value, type it and press Enter (or type a comma), or click one of the suggestions shown under each box. Suggestions include values your organisation already uses, plus some common defaults. To remove a value, click the × on it.
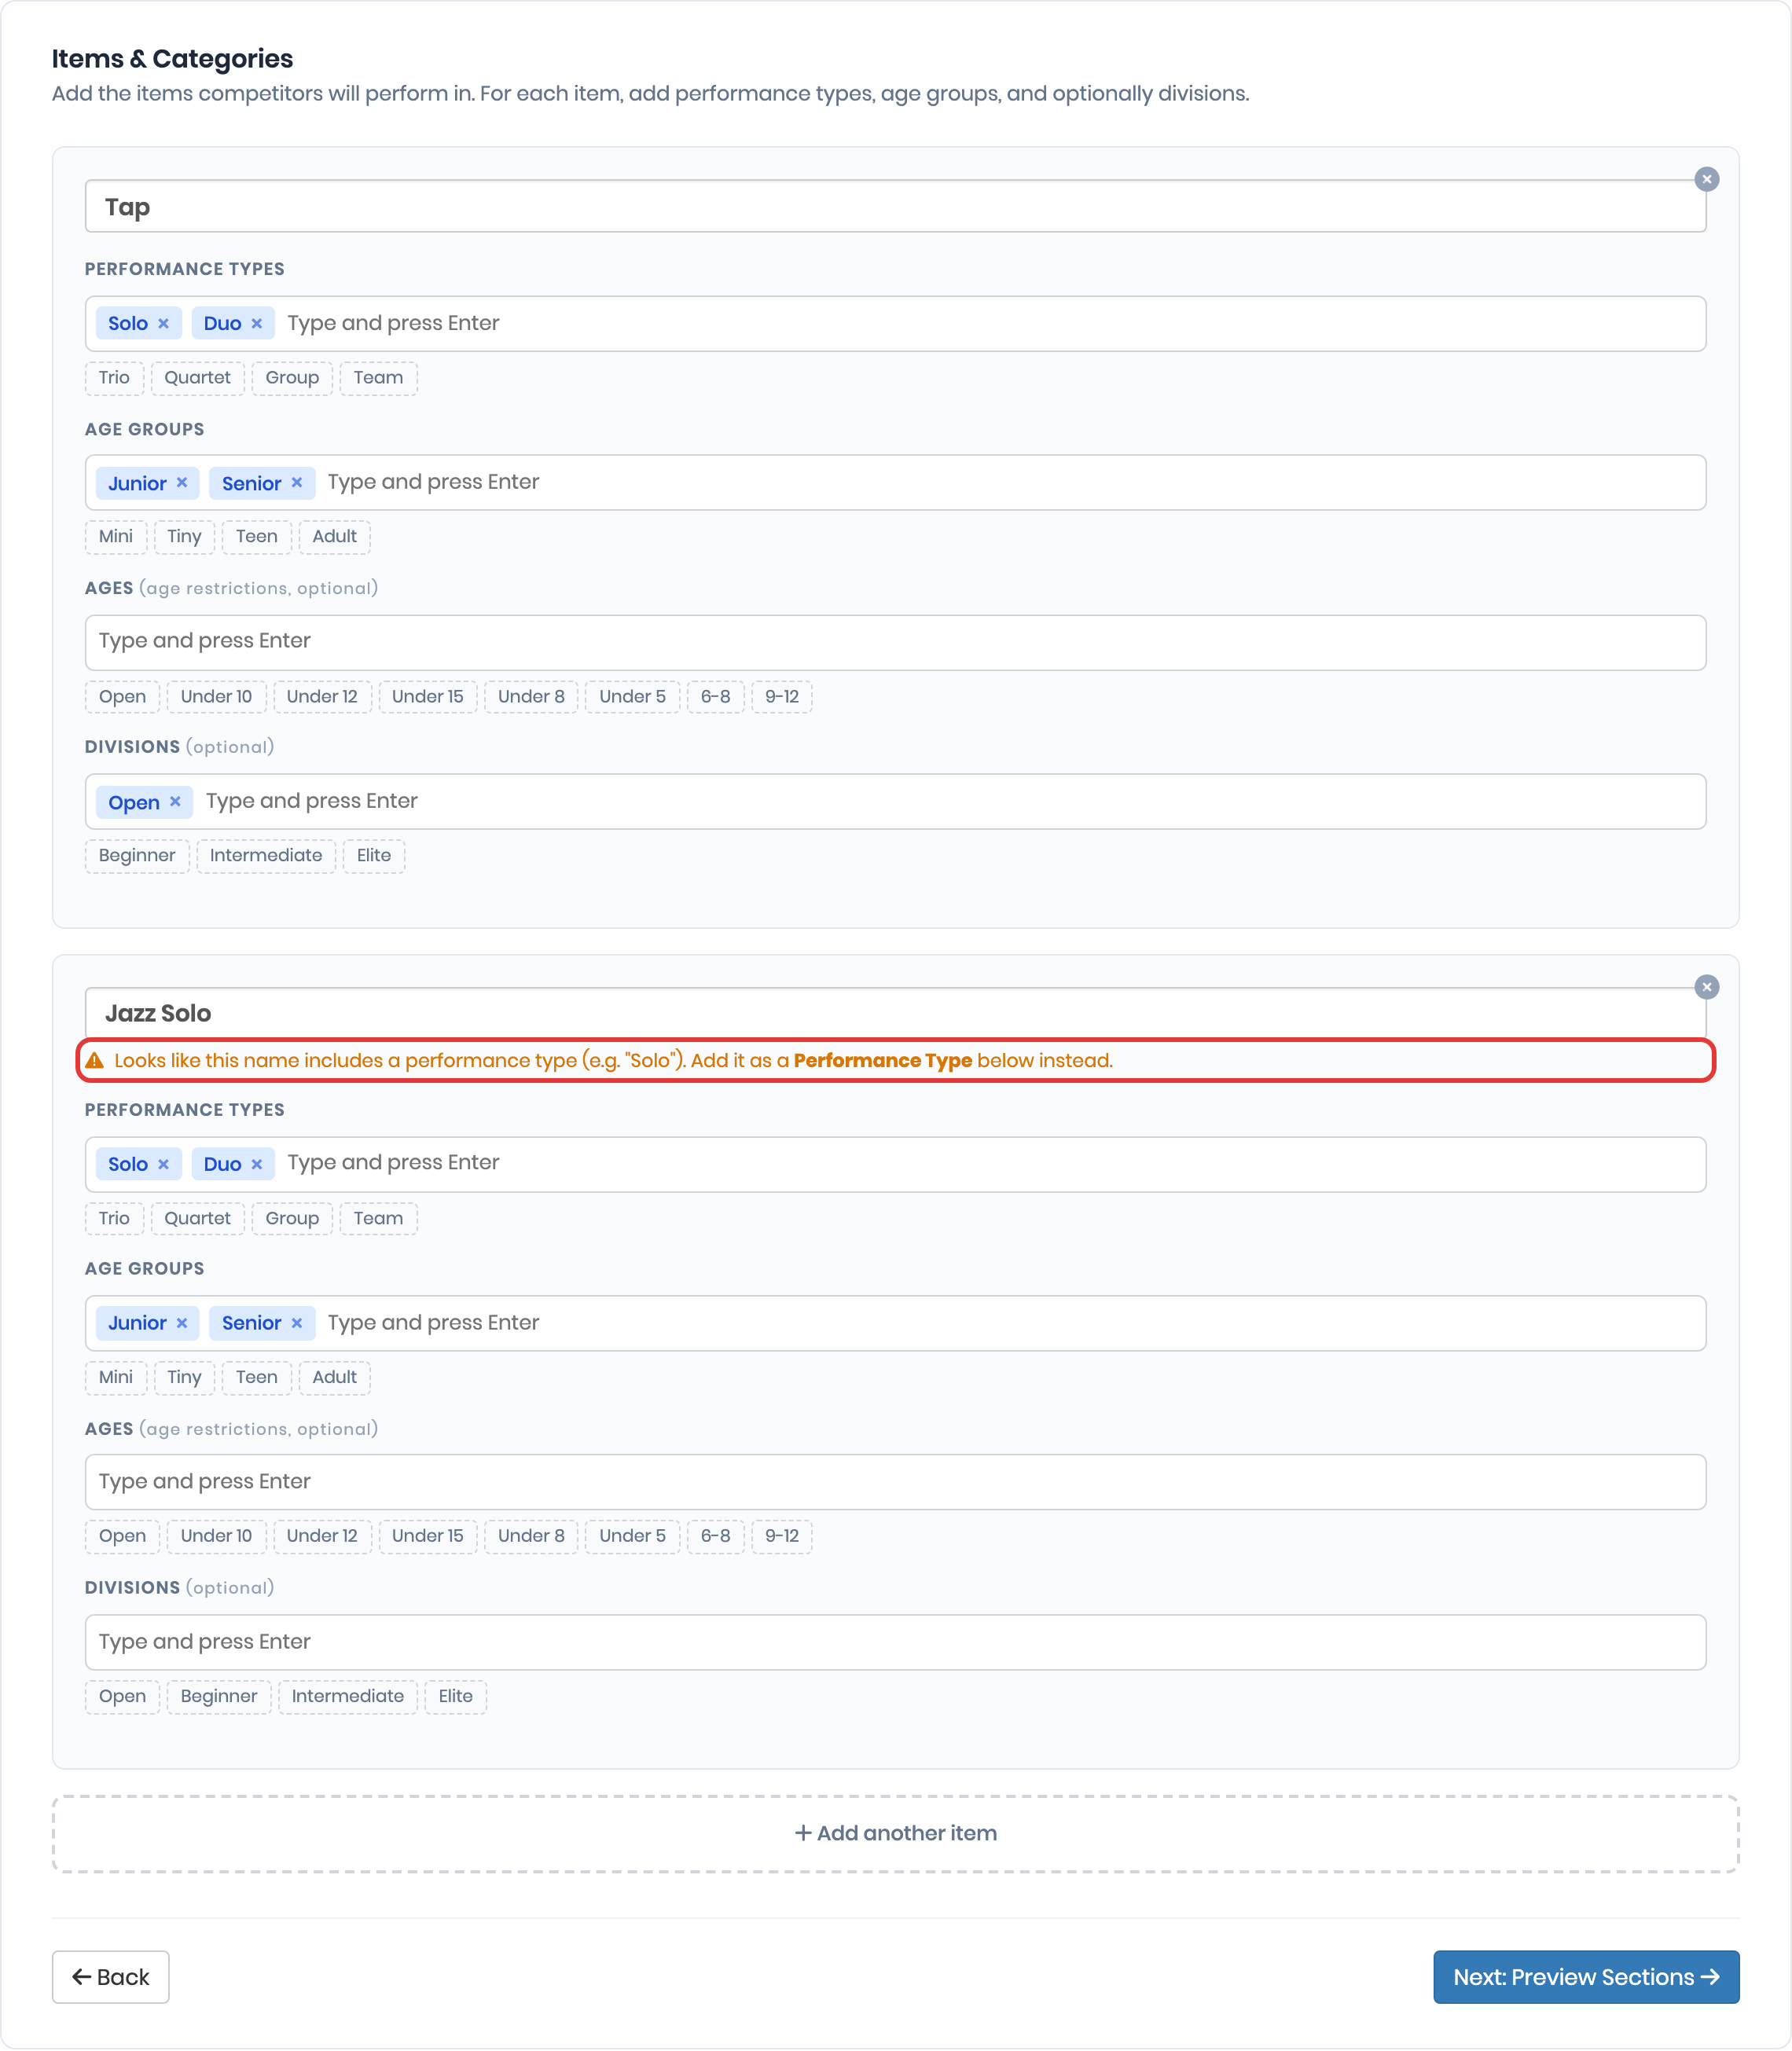
Note
If you type a name that already exists in your organisation's Reference Data (the match ignores capitals), the wizard uses the existing one. Otherwise it creates a new one for you.
Keep item names simple
Put only the item itself in the item name. If the name includes a word that looks like a performance type ("Solo"), an age group ("Junior"), an age ("Under 12") or a division ("Open"), the wizard shows a warning suggesting you add it in the right category instead. Section names are built from all the parts, so repeating them in the item name makes section names longer.
Step 3: Preview Sections
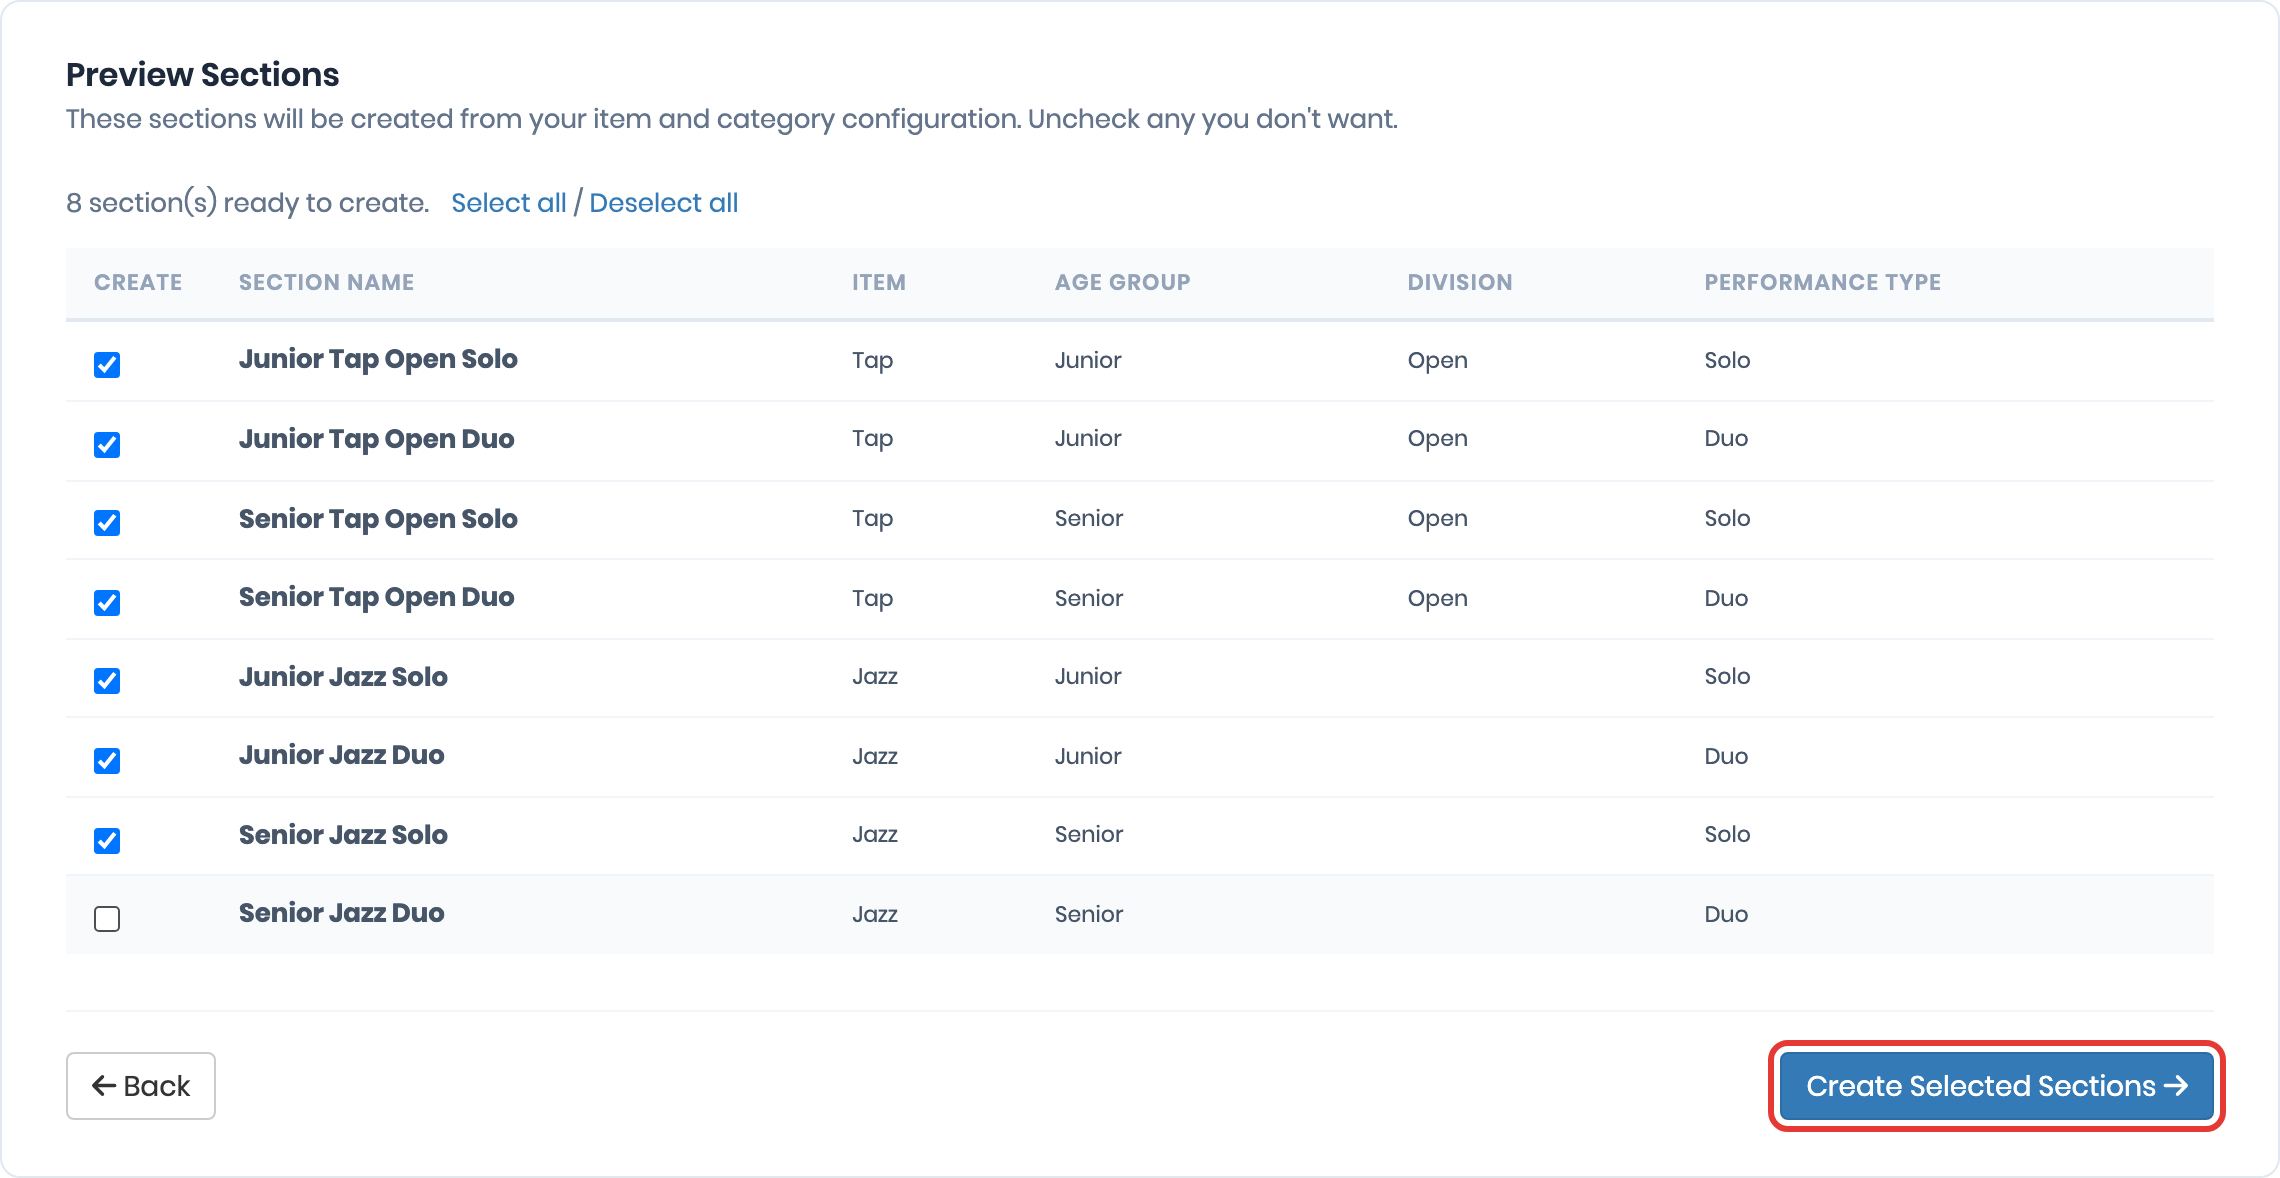
This step lists every section that will be created from your items and categories, with its Section Name, Item, Age Group, Division and Performance Type.
- Check the list. All new sections are ticked by default.
- Untick any sections you don't want. Click a row to tick or untick it, or use Select all / Deselect all.
- Click Create Selected Sections.
Note
Sections that already exist for this event show a green tick instead of a checkbox, and aren't created again. This means you can go back to step 2, add another item, and come back to create only the new sections.
If you see "No sections could be generated", go back and make sure each item has at least one age group and one performance type.
Tip
Section numbers, dates, times and locations aren't set by the wizard. Add these later by editing each section, or through scheduling.
Step 4: Extras
This step is for extras available with the event. If you don't need it, click Next: Registration Data to skip it.
Step 5: Registration Data
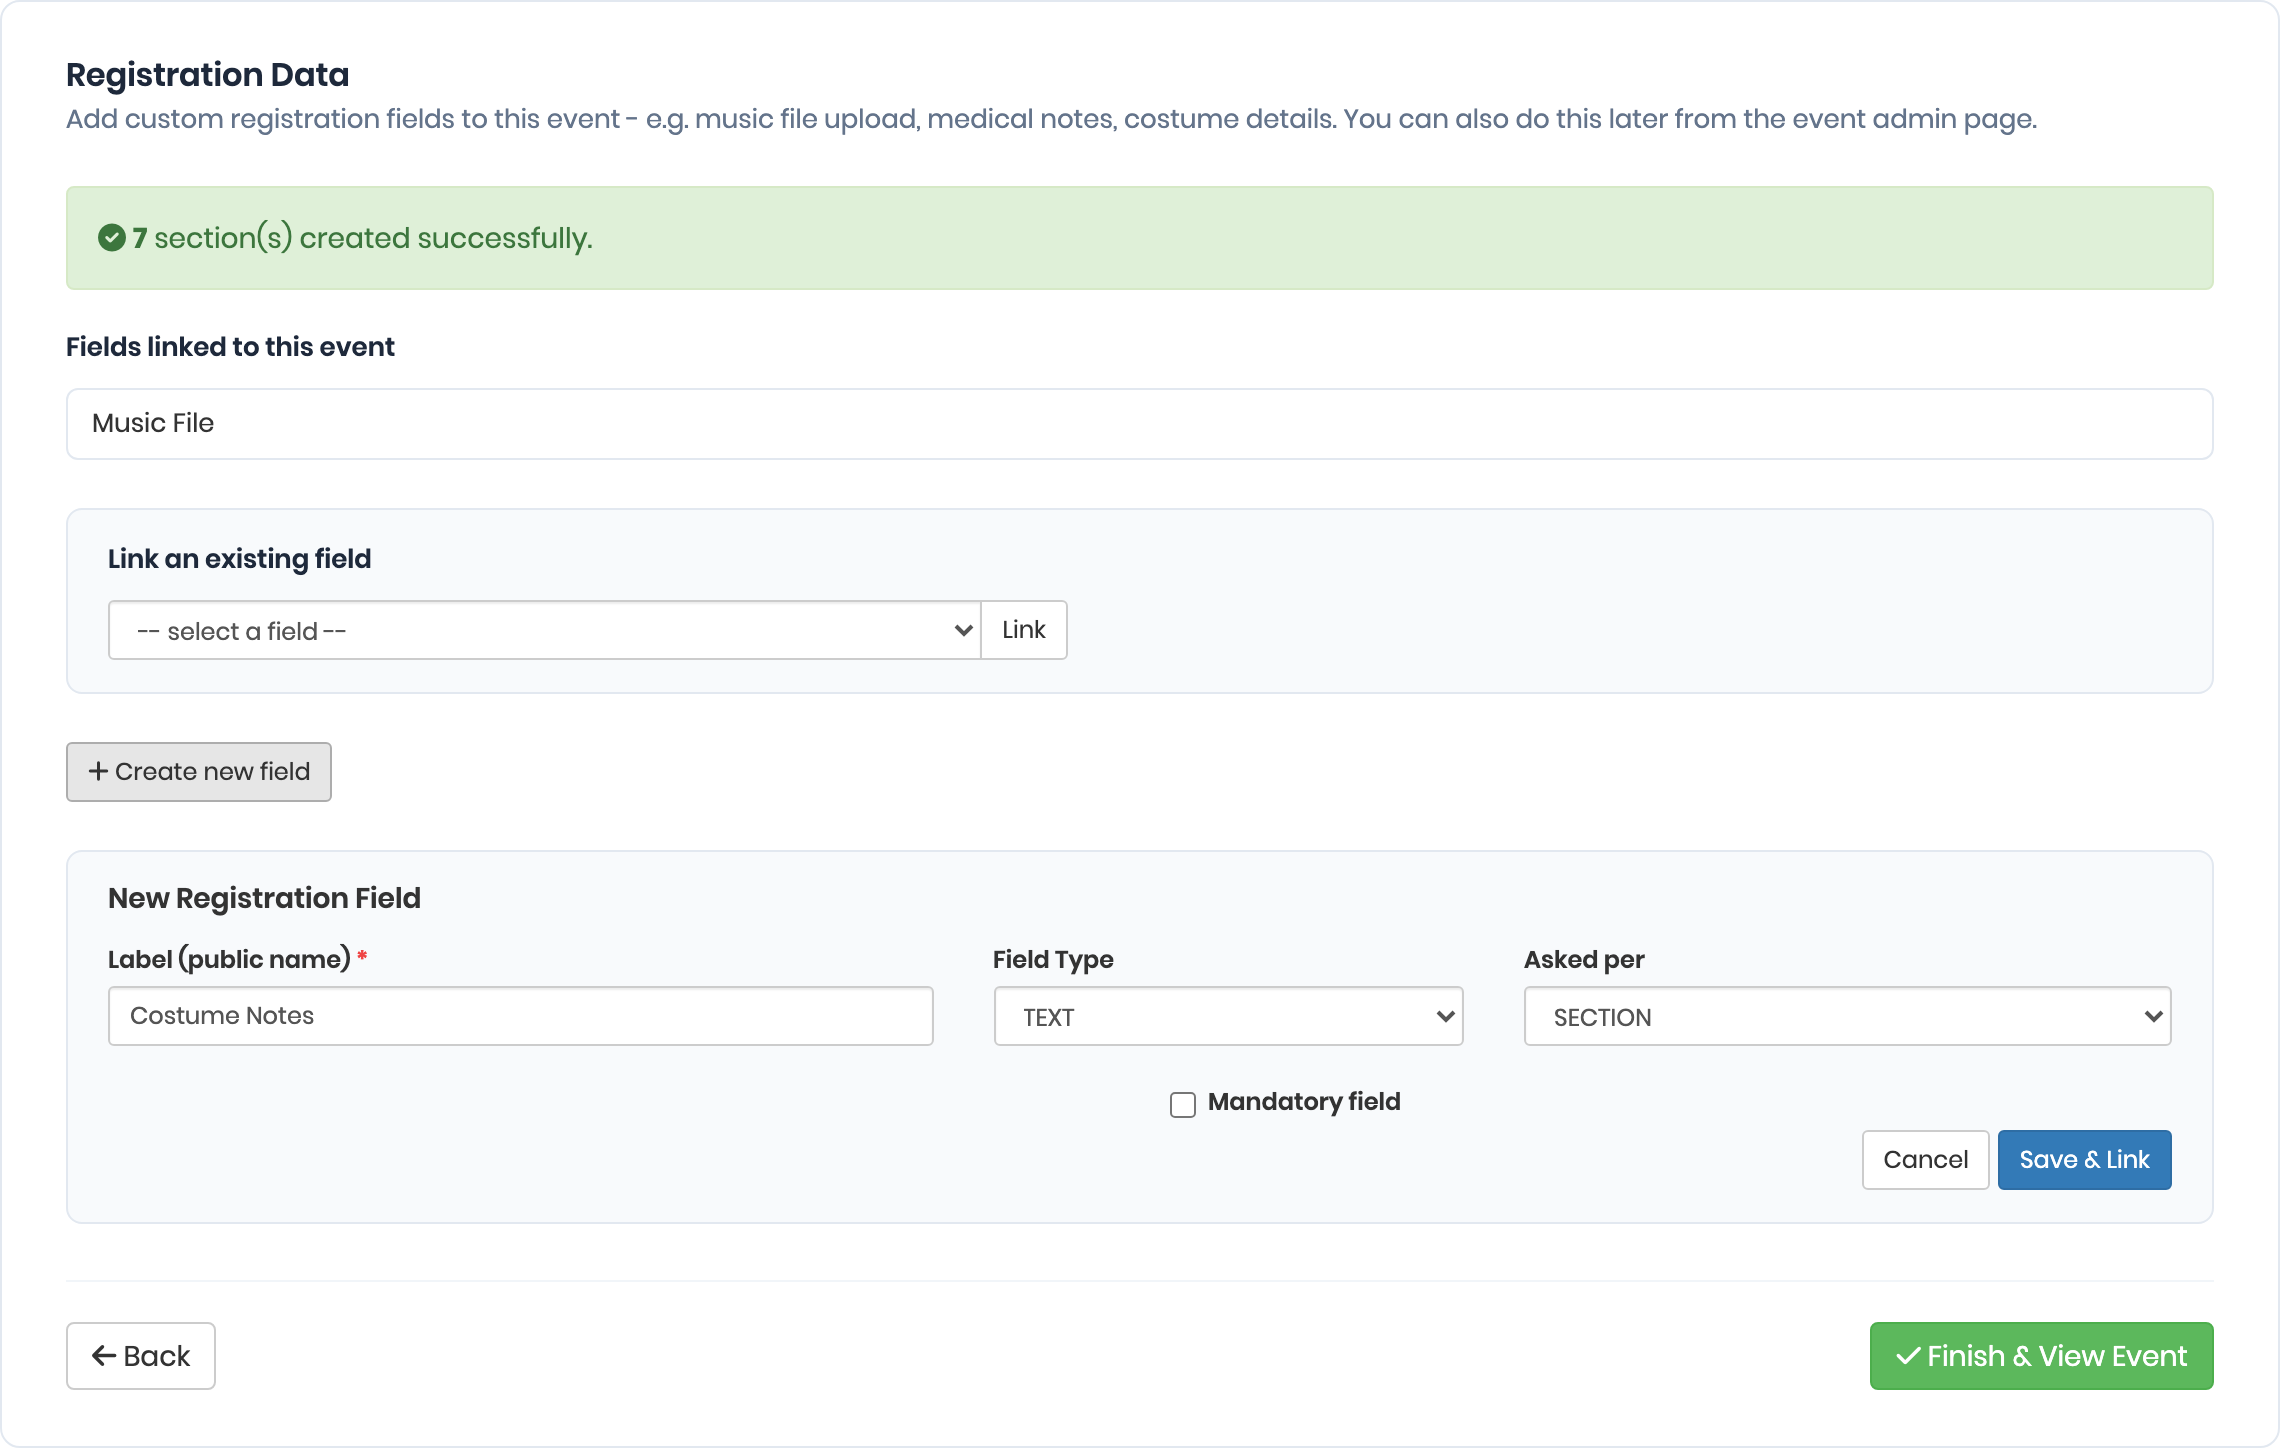
Add custom registration fields to the event, for example a music file upload, medical notes or costume details. You can also do this later from Registration Data on the Administration dashboard (see Registration Data).
A message at the top shows how many sections were created in step 3.
To link a field your organisation already has:
- Under Link an existing field, select the field.
- Click Link. The field appears under Fields linked to this event.
To create a new field:
- Click Create new field.
- Enter the Label (public name), for example "Music File". This is required.
- Choose the Field Type. For option-type fields, enter the Options, one per line.
- Choose how often it is Asked per.
- Tick Mandatory field if entrants must answer it.
- Click Save & Link.
When you're done, click Finish & View Event. You are taken to the event page.
After the wizard
From the event page, finish setting up the event:
- Click Edit Details to set pre-registration dates, the date for age calculation, capacity, entry rules and terms and conditions. See Edit event settings.
- Use Actions > Edit Mapping to link the event's locations.
- Click Edit Content Page to add a public description and cover photo for the public event page.
- Click Publish when you're ready for the event to appear publicly. See The public event page.